
Static site generators are all the rage lately. This very website that you are reading is also powered by a static site generator and I love it. But why have they become so popular? What advantages do they have in comparison to some content management system such as Wordpress?
First of all, Wordpress uses server-side code. It means that each time a user enters a website, Wordpress fetches the content from the database and re-creates the pages for you. That is, content is created only after you request it. With static site generators, you pre-create everything and serve the ready content to all users. This is much faster than dynamically recreating the content each time.
Second of all, you need to host your CMS somewhere and take care of your infrastructure. Although, it is pretty cheap now, it is still a headache. With static site generators, you have GitHub Pages which takes care of everything for you absolutely for free. It is extremely easy as well.
Additionally, as CMSs rely on a programming language and a database, it is by definition less secure than a static web site.
How it works
The way static site generators work is pretty simple. You write your blog posts in a markdown file and when you run your static site generator, it will compile your posts into pre-created templates which then can be served to your readers.
For example, let's say that you have a markdown file introduction-to-kubernetes.md in which you have your post content:
title: Introduction to Kubernetes
date: 2018-02-03 20:10

Looking back, 2017 was the year Kubernetes conquered the container orchestration space. For years, Kubernetes' rivals
such as Docker Swarm and Mesos have been offering their own container orchestration tools and now they both added
support for Kubernetes within their ecosystems. The largest cloud providers such as AWS, Microsoft Azure and Oracle
Cloud announced Kubernetes integrations into their respective cloud platforms, not mentioning Google where Kubernetes
came from originally. So, every developer would benefit from at least learning the basics of Kubernetes. That's exactly
what we are going to do in this post.
Also, you have this template:
<html>
<head>

<title>{{ title }}</title>

</head>

<p>Published at: {{ date }}</p>

<body>
{{ content }}
</body>

</html>
And when you run your static site generator, you will have something like this as a result:
<html>
<head>

<title>Introduction to Kubernetes</title>

</head>

<p>Published at: 2018-02-03 20:10</p>

<body>
Looking back, 2017 was the year Kubernetes conquered the container orchestration space. For years, Kubernetes' rivals
such as Docker Swarm and Mesos have been offering their own container orchestration tools and now they both added
support for Kubernetes within their ecosystems. The largest cloud providers such as AWS, Microsoft Azure and Oracle
Cloud announced Kubernetes integrations into their respective cloud platforms, not mentioning Google where Kubernetes
came from originally. So, every developer would benefit from at least learning the basics of Kubernetes. That's exactly
what we are going to do in this post.
</body>

</html>
What happened is that your generator parsed the markdown and put the details in your template where they belong. Easy!
The next step is you deploy these ready files and your readers will enjoy your fast and secure content. And after a year or so you become famous and be buried with thousands of offers for a job or partnership.
Such a simple but at the same time very powerful idea.
Seems like a pretty good idea for a weekend project, doesn't it? Why don't we try to create our own version of a static site generator, you and I? What do you say? A very basic one. Agree? Cool! Let's get started.
Let's reinvent static site generators
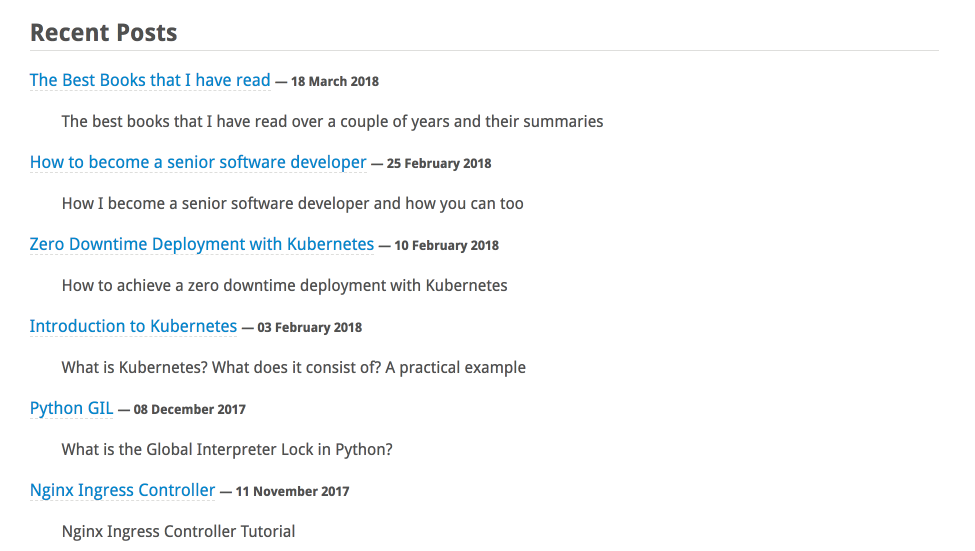
Here is the plan. We will do two pages. On the first main page, we are going to show the list of all posts, sorted by date, with their titles, published date and their summary, which will look something like this:
Then, if the user clicks on the title of any post, he is taken to its detail page where he can read the whole content:

Okay? Let's create our project folder then:
mkdir custom-ssg
ssg stands for Static Site Generator, by the way.
In this folder, create the content folder where we will write our markdown files, that is, our blog posts:
cd custom-ssg & mkdir content
In the content folder, create your first blog post file how-to-become-senior.md and copy the contents of this file.
In the project root, create ssg.py which will be our main file where we will write our script to generate static pages.
Now, we need a way to turn markdown files such as the one we created that looks like this:
title: How to become a senior software developer?
date: 2019-03-10 20:10
slug: how-to-become-senior-software-developer
summary: You have been a junior or a middle developer for too long now. You feel like you deserve more. You feel like it is time to grab life by the balls and rise up the career ladder.

You have been a junior or a middle developer for too long now. You feel like you deserve more. You feel like it is time
to grab life by the balls and rise up the career ladder. Well, congratulations! You are so lucky to be reading this blog post
because I am about to reveal a secret ingredient I used to become a senior software developer. This is a unique ingredient
which no one else is aware of and which will skyrocket your career in no time. But I warn you! This is not an easy feat
to accomplish. Ready? Let's go.
...
into something like this:
{
    'date': '2019-03-10 20:10',
    'slug': 'how-to-become-senior-software-developer',
    'summary': 'You have been a junior or a middle developer for too long now. You feel like you deserve more. You feel like it is time to grab life by the balls and rise up the career ladder.',
    'title': 'How to become a senior software developer?'
    'content': '<p>You have been a junior or a middle developer for too long now. You feel like you deserve more.</p>...'
 }
Fortunately, the coolest Python community has already done the work for us and written this awesome library. Before we install it, please note that the best practice is to use a virtualenv for packages. Let's install the package:
pip install markdown2
Now, let's try this out in our ssg.py:
from markdown2 import markdown

with open('content/how-to-become-senior.md', 'r') as file:
    parsed_md = markdown(file.read(), extras=['metadata'])

    print('Metadata: ', parsed_md.metadata)
    print('Content: ', parsed_md)
The output should be the following:
Metadata: {'title': 'How to become a senior software developer?', 'date': '2019-03-10 20:10', 'slug': 'how-to-become-senior-software-developer', 'summary': 'You have been a junior or a middle developer for too long now. You feel like you deserve more. You feel like it is time to grab life by the balls and rise up the career ladder.'}

Content: <p>You have been a junior or a middle developer for too long now. You feel like you deserve more. You feel like it is time...
Great. Exactly what we needed! Now we can use these variables to create pages. But before that we need templates and not just ordinary html files but ones with placeholders for our variables.
For example, this:
<!DOCTYPE html>
<html lang="en">
<head>
  <meta charset="UTF-8">
  <title>{{post.title}}</title>
</head>
<body>

<h1>{{post.title}}</h1>

<small>{{post.date}}</small>

{{post.content}}

</body>
</html>
If we had this template file, we could use the variables we generated above and insert them into this template. Fortunately, that's easy too thanks to Jinja2, a modern templating language for Python. Install it:
pip install jinja2
To try Jinja2 out, create a folder templates in the project root and create a post-detail.html and put the above html inside this file.
Now, in your ssg.py, append the following code:
from jinja2 import Environment, PackageLoader

env = Environment(loader=PackageLoader('custom-ssg', 'templates'))
post_detail_template = env.get_template('post-detail.html')

data = {
    'content': parsed_md,
    'title': parsed_md.metadata['title'],
    'date': parsed_md.metadata['date']
}

print(post_detail_template.render(post=data))
After this, your ssg.py should look like this:
from jinja2 import Environment, PackageLoader
from markdown2 import markdown

with open('content/how-to-become-senior.md', 'r') as file:
    parsed_md = markdown(file.read(), extras=['metadata'])

    env = Environment(loader=PackageLoader('ssg', 'templates'))
    post_detail_template = env.get_template('post-detail.html')

    data = {
        'content': parsed_md,
        'title': parsed_md.metadata['title'],
        'date': parsed_md.metadata['date']
    }

    print(post_detail_template.render(post=data))
As you can see here, the first thing we need to do is to create an Environment by showing where the templates folder is located. Then, with this environment we get the template we need and at the end we call render() function and pass it the data it needs.
If you run your ssg.py, you will see that the code parsed the markdown and put all the data in its own place in the above template. Great!
But before we can reinvent static site generators, we should create the index.html where we show the list of all posts. So, create index.html inside the templates folder and put the following in this file:
<!DOCTYPE html>
<html lang="en">
<head>
  <meta charset="UTF-8">
  <title>List of Posts</title>
</head>
<body>

<h1>My Blog Posts</h1>

{% for post in posts %}
  <p>
      <h2>{{loop.index}}: <a href="posts/{{ post.slug }}/">{{post.title}}</a> <small>{{post.date}}</small></h2>
      {{post.summary}}
  </p>
{% endfor %}

</body>
</html>
We are simply looping through the posts list and showing all the data except the main content.
We have all the pieces now and we can get started with building our static site generator.
We will do it in several steps. First, delete the contents of ssg.py. We will write the real code now.
Now, let's import all the packages that we will need along the way:
import os
from datetime import datetime
from jinja2 import Environment, PackageLoader
from markdown2 import markdown
What we will do next is parse all markdown files and collect them in a dictionary so that we can use them later:
POSTS = {}
for markdown_post in os.listdir('content'):
    file_path = os.path.join('content', markdown_post)

    with open(file_path, 'r') as file:
        POSTS[markdown_post] = markdown(file.read(), extras=['metadata'])
Fairly easy. Next we sort these posts by their published date in a reversed order so that we show the newest ones first:
POSTS = {
    post: POSTS[post] for post in sorted(POSTS, key=lambda post: datetime.strptime(POSTS[post].metadata['date'], '%Y-%m-%d  %H:%M'), reverse=True)
}
One thing to note here is we need to convert the date to datetime first in order to properly sort the posts as comparing strings would not work correctly.
Next, we get the html template files with Jinja2:
env = Environment(loader=PackageLoader('ssg', 'templates'))
index_template = env.get_template('index.html')
post_template = env.get_template('post-detail.html')
Now, we can render the index.html by passing the data it needs:
index_posts_metadata = [POSTS[post].metadata for post in POSTS]

index_html_content = index_template.render(posts=index_posts_metadata)
Now we can create write the contents of index_html_content into a real file inside the output folder that we can serve to our users:
with open('output/index.html', 'w') as file:
    file.write(index_html_content)
We don't have the output folder yet, so create it:
mkdir output
If you run your ssg.py at this point, you will have index.html inside your output folder and if you open it in the browser, it will look like this:

Try adding these top-books-i-read.md and nginx-ingress.md into your content folder and then run ssg.py again.
You will now see that your index.html has three posts listed:

However, if you click on the title, there will be a not found error as we haven't generated the detail pages yet.
It is also not difficult to do. Append the following code to ssg.py:
# render each post and write it to output/posts/<post.slug>/index.html
for post in POSTS:
    post_metadata = POSTS[post].metadata

    post_data = {
        'content': POSTS[post],
        'title': post_metadata['title'],
        'date': post_metadata['date'],
    }

    post_html_content = post_template.render(post=post_data)

    post_file_path = 'output/posts/{slug}/index.html'.format(slug=post_metadata['slug'])

    os.makedirs(os.path.dirname(post_file_path), exist_ok=True)
    with open(post_file_path, 'w') as file:
        file.write(post_html_content)
As you can see, we loop through the posts, get the needed data, render the template by passing it the data and then create a file out of this rendered data in an appropriate folder.
Now run your ssg.py and then click on the title of a post. You will now see the whole content of the post you clicked:

Congratulations, you have just built your own static site generator. Cool, right? If you want to challenge yourself, go ahead and add other features such as tagging, pagination and deploy your blog in Github Pages.
If something is not clear, let me know in the comments. I may have made some mental shortcuts along the way :)
Fight on!