
This tutorial is the continuation of this one where we learned how to run a django app with nginx and gunicorn. Now we will add Supervisord into the mix.
The reason we need Supervisord
Right now, we have our app running with Nginx and Gunicorn. However, every time our machine boots we have to start gunicorn and overall, controlling (stopping, restarting and etc) gunicorn is very difficult. What we want is an easy way of doing so.
Welcome Supervisord which allows us to monitor and control a number of processes on UNIX-like operating systems.
Let's remember how we used to start our app:
gunicorn --daemon --workers 3 --bind unix:/home/ubuntu/myproject/myproject.sock myproject.wsgi
I know right?! It is very long to type and those paths are very error prone. Now, try to stop that daemon (see what I mean? :) ). We will have to find all those gunicorn processes and kill them, which is at least cruel.
With supervisord at our disposal, it will be very easy and convenient to execute those commands:
supervisorctl start myproject
supervisorctl stop myproject
supervisorctl restart myproject
You see how easy it is now?! Good. Now, let's set up this beast.
Installation and Setup
To install, type the following:
sudo apt-get install supervisor
Now, restart it:
sudo service supervisor restart
The main configuration file of supervisord is here /etc/supervisor/supervisord.conf. If we take a look, we will see that it contains these lines:
[include]
files = /etc/supervisor/conf.d/*.conf
It means that config files of specific projects can be stored here /etc/supervisor/conf.d/ and they will be included in that main file.
So, let's create myproject.conf in /etc/supervisor/conf.d/ folder:
sudo vim /etc/supervisor/conf.d/myproject.conf
and configure our project:
[program:myproject]
command=/home/ubuntu/myprojenv/bin/gunicorn --workers 3 --bind unix:/home/ubuntu/myproject/myproject.sock myproject.wsgi
directory=/home/ubuntu/myproject
autostart=true
autorestart=true
stderr_logfile=/var/log/myproject.err.log
stdout_logfile=/var/log/myproject.out.log
Let's look at the significance of each line now:
[program:myproject]
Here, we are defining a program with the name myproject. This name will be used when we do such commands as:
sudo supervisorctl start myproject
Next:
command=/home/ubuntu/myprojenv/bin/gunicorn --workers 3 --bind unix:/home/ubuntu/myproject/myproject.sock myproject.wsgi
This line is used to define a command which is used when we start or restart our project.
directory=/home/ubuntu/myproject
This line indicates a path from which that command will be run.
autostart=true
autorestart=true
These lines define certain behavior of the script under different conditions. Autostart tells the script to start on system boot and autorestart tells it to restart when it exists for some reason.
stderr_logfile=/var/log/myproject.err.log
stdout_logfile=/var/log/myproject.out.log
And these final lines define two files where different kinds of logs are stored. Obviously, error logs will be stored in myproject.err.log and others in myproject.out.log.
Let's save the file and execute the following commands to bring these changes into effect:
sudo supervisorctl reread
sudo supervisorctl update
Well, that's pretty much it. Simple, right? To verify that everything is working, type this:
ps ax | grep gunicorn
You should see several gunicorn processes running. Or, you can go to localhost:8000 and you will see your django app up and running.
Or, you can now use supervisor to check whether your app is running:
sudo supervisorctl status myproject
Now, go ahead and play with those supervisorctl commands to start, stop, restart and check the status of your app.
Let's do one more thing. Let's see the builtin supervisor web interface in action. Those who don't like command line to control processes will love this.
Open up /etc/supervisor/supervisor.conf and place these lines at the beginning of the file:
[inet_http_server]
port=0.0.0.0:9001
This will indicate that the supervisor web interface will run on 0.0.0.0:9001.
Save the file and reload supervisor:
sudo supervisorctl reload
Open up your browser and go to 0.0.0.0:9001. You will see something like this:
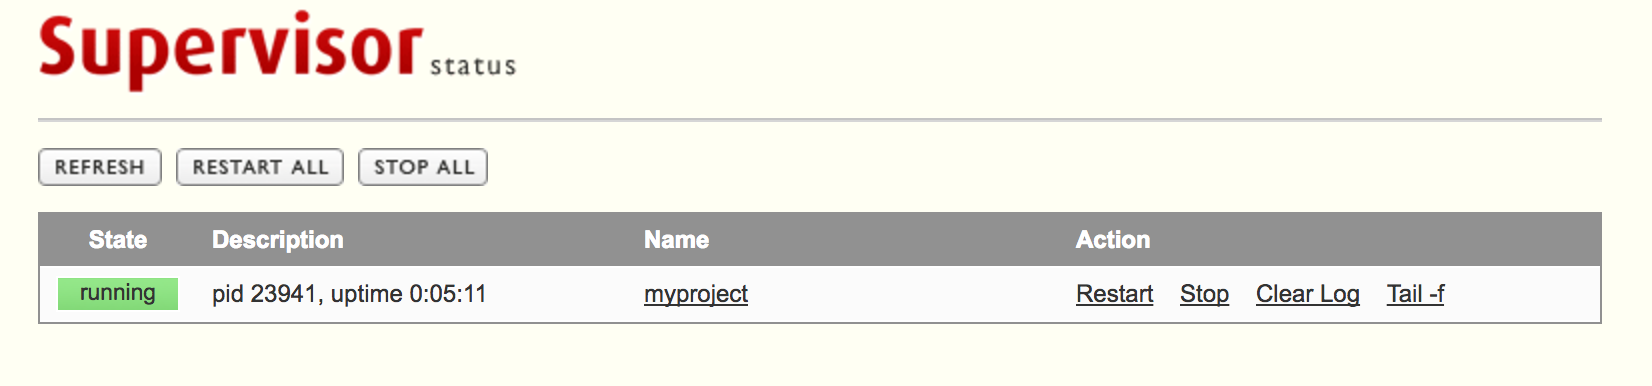
Cool, right?! Go ahead and play with it to control your project.
Thanks for reading thus far. Now you have one more tool in your arsenal.