
It is 2018 and your users will not, I repeat, WILL NOT tolerate any downtime or outage with your application. Especially if your app is in the B2B sector and other people's money depends on your app. That's why, as a responsible developer you come to the office on Sundays and deploy the new version of your application hoping that people are not using your application on weekends and that everything will go smoothly and there will be only 10 minutes of downtime as usual. You go to Intercom ( or whatever you use for customer support) and see that there are already a few people complaining about the outage. You tell them everything is fine now and go home with a bad mood. You don't want to do anything now but drink/smoke/(insert your bad habit here).
Instead of all that BS, you could have used your Sunday for something more useful. Only if there was no downtime while deploying a new version. But that's just an unachievable dream. Even Kelsey Hightower himself admitted that it is a tough thing to do in his PyCon Keynote in 2017.
Well, I am happy to tell you that with Kubernetes it is extremely easy, I repeat, EXTREMELY EASY to do a zero-downtime deployment . Are you feeling excited? Let's see a practical example then, shall we?
Note that this post assumes that you know the basics of Kubernetes. If not, see this post
Deploy your app
I have prepared Docker images for an app that simply states this in the first version:
Version 1 of my awesome app! Money is pouring in!
and the second version of this app says this:
Version 2 of my awesome app! More Money is pouring in!
But before it starts running it will wait for 20 seconds. This is needed in order to illustrate downtime between deployments.
Now let's write a deployment for the app (deployment.yaml):
apiVersion: extensions/v1beta1
kind: Deployment
metadata:
  name: myapp-deployment
spec:
  template:
    metadata:
      labels:
        app: myapp
    spec:
      containers:
      - name: myapp-container
        image: jahongirr/myapp:1
        imagePullPolicy: Always
        ports:
          - containerPort: 80
            protocol: TCP
Everything is simple here. We are running our app on the port 80. Time to create the deployment:
kubectl create -f deployment.yaml
Verify that the app is running by doing kubectl get pods. If you see something like the following, you should be good:
myapp-deployment-5c66bd8856-t6rrt 1/1 Running 0 6m
Now, let's expose our deployment so that it has an external IP through which it can receive traffic to the app:
kubectl expose deployment/myapp-deployment --type="LoadBalancer" --port 80
Note that exposing a deployment like this is not good. For how this should be done in a real project, see this post.
After some time, do kubectl get services in order to find out the external IP of our app. You should see something like this:
NAME                        TYPE           CLUSTER-IP     EXTERNAL-IP      PORT(S)             AGE
myapp-deployment            LoadBalancer   10.3.248.68    100.193.114.176   80:31483/TCP        10m
Type that EXTERNAL-IP in your browser and you should see this:
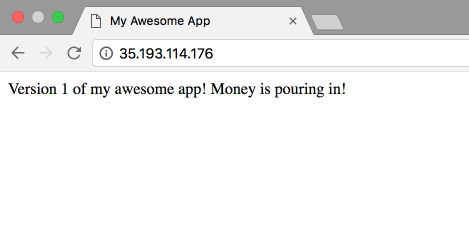
Now, let's deploy the second version of our app. To do that, change the version of the container in your deployment.yaml:
apiVersion: extensions/v1beta1
kind: Deployment
metadata:
  name: myapp-deployment
spec:
  template:
    metadata:
      labels:
        app: myapp
    spec:
      containers:
      - name: myapp-container
        image: jahongirr/myapp:2
        imagePullPolicy: Always
        ports:
          - containerPort: 80
            protocol: TCP
Before we apply the change, open your terminal and do this:
while True
    do
        curl 100.193.114.176
        sleep 1s
    done
Make sure you use your own external IP here. This will send a request to our app every second. Run it and you will see this every second:
<!doctype html>
<html lang="en">
<head>
  <meta charset="utf-8">
  <title>My Awesome App</title>
</head>
<body>

  Version 1 of my awesome app! Money is pouring in!

</body>
</html>
Cool. We know that our app is working. Now, in another terminal, let's apply our change:
kubectl apply -f deployment.yaml
Go back to the previous terminal window and watch. You will see that some of the requests did not go through and said this:
curl: (7) Failed to connect to 100.193.114.176 port 80: Connection refused
curl: (7) Failed to connect to 100.193.114.176 port 80: Connection refused
Only after some time we see that our app started working again with the version 2:
curl: (7) Failed to connect to 35.193.114.176 port 80: Connection refused
curl: (7) Failed to connect to 35.193.114.176 port 80: Connection refused
curl: (7) Failed to connect to 35.193.114.176 port 80: Connection refused
curl: (7) Failed to connect to 35.193.114.176 port 80: Connection refused
curl: (7) Failed to connect to 35.193.114.176 port 80: Connection refused
<!doctype html>
<html lang="en">
<head>
  <meta charset="utf-8">
  <title>My Awesome App</title>
</head>
<body>

  Version 2 of my awesome app! More Money is pouring in!

</body>
</html>
<!doctype html>
<html lang="en">
<head>
  <meta charset="utf-8">
  <title>My Awesome App</title>
</head>
<body>

  Version 2 of my awesome app! More Money is pouring in!

</body>
</html>
This is the downtime we have been afraid of. Now, the time has come to awaken our inner ninja and remove this downtime so that users don't feel let down by us.
To do that, we use something called readiness probe. Basically, this is a check that Kubernetes does in order to make sure that your pod is ready to send traffic to it. Until it is not ready, Kubernetes will not use your pod. Easy! In our case, it looks like this:
readinessProbe:
  httpGet:
    path: /
    port: 80
  initialDelaySeconds: 5
  periodSeconds: 5
  successThreshold: 1
We are basically telling Kubernetes to send an http get request to the path / every five seconds and if it is successful, mark the pod ready and start sending traffic to it.
Another thing that we should know is something called RollingUpdate strategy. It looks like this:
  strategy:
    type: RollingUpdate
    rollingUpdate:
      maxUnavailable: 0
      maxSurge: 1
It basically tells Kubernetes that there should be zero unavailable pods while deploying (maxUnavailable: 0) and there should be one new pod at a time (maxSurge: 1).
Combine these two things and our deployment.yaml will look like this:
apiVersion: extensions/v1beta1
kind: Deployment
metadata:
  name: myapp-deployment
spec:
  strategy:
    type: RollingUpdate
    rollingUpdate:
      maxUnavailable: 0
      maxSurge: 1
  template:
    metadata:
      labels:
        app: myapp
    spec:
      containers:
      - name: myapp-container
        image: jahongirr/myapp:1
        imagePullPolicy: Always
        ports:
          - containerPort: 80
            protocol: TCP
        readinessProbe:
          httpGet:
            path: /
            port: 80
          initialDelaySeconds: 5
          periodSeconds: 5
          successThreshold: 1
Make sure that our while loop check is running and saying that the v2 of our app is working. Let's apply our changes now and watch the while loop:
kubectl apply -f deployment.yaml
After some time you will see that v1 start to run right after v2 without any delay:
<!doctype html>
<html lang="en">
<head>
  <meta charset="utf-8">
  <title>My Awesome App</title>
</head>
<body>

  Version 2 of my awesome app! More Money is pouring in!

</body>
</html>

<!doctype html>
<html lang="en">
<head>
  <meta charset="utf-8">
  <title>My Awesome App</title>
</head>
<body>

  Version 1 of my awesome app! Money is pouring in!

</body>
</html>
God, this feels great, doesn't it. No more Connection refused errors between deployments.
Congratulations!!! We have done it. Pat yourself in the back. You know what the implications of this are? You don't have to deploy on Sundays now and use it for something better. You can deploy any day you want. No more customer complaints about downtime/outage. You are free!
Conclusion
As you can see with 10 more lines of code we have achieved that mythical zero-downtime deployment. With Kubernetes it is not mythical and dark anymore.
Let me know in the comments if you have any questions regarding this. Thanks for reading.
Fight on!
You may also find these related posts interesting: Introduction to Kubernetes, Nginx Ingress Controller